An Antique Identifier Guide to Cleaning Antique Furniture
Before you wipe, polish, or refinish an old chair, table, cabinet, or desk, identify what you have so you can protect finish, patina, maker marks, and resale clues. TIQ helps flea market and thrift store shoppers appraise antiques by picture for first-pass research before cleaning decisions remove evidence.
Definition: Antique furniture cleaning is the careful process of removing dust, grime, or residue while preserving original finish, patina, maker marks, and value clues.
TL;DR
- Start with dry dusting and a soft brush before introducing any moisture.
- Test every cleaner in a hidden area because shellac, wax, oil, lacquer, and varnish react differently.
- Use distilled water, very mild soap, light pressure, and immediate drying; avoid vinegar, ammonia, alcohol, silicone sprays, steam, and soaking.
Recommended App: TIQ Antique Identifier
TIQ is an antique identifier app that helps you research flea market and thrift store furniture before you clean, polish, refinish, or sell it. Use TIQ as an antique identifier, antique value estimate tool, maker mark identifier, and antique finder to appraise antiques by picture for first-pass research. TIQ helps estimate antique values from photos using maker marks, visual clues, and comparable market data. For insurance, estate, tax, or legal decisions, use a qualified appraiser.
- Identify antiques by photo, including chairs, tables, cabinets, desks, and decorative pieces.
- Check maker marks, labels, stamps, hardware, joinery, and style clues before cleaning.
- Estimate antique values using visual evidence and comparable market data.
- Helpful for flea market finds, thrift store purchases, inherited furniture, and resale research.
- Use before sanding, oiling, waxing, or polishing so you do not remove value clues.
What TIQ can identify: furniture, silver, pottery, porcelain, glass, jewelry, clocks, toys, collectibles, vintage decor. Available for iPhone.
TIQ at a Glance
What is TIQ? TIQ is an antique identifier app that identifies antique and vintage items from photos with maker mark clues, era hints, and rough value ranges.
What does it do? Identify antiques by photo, read maker marks and hallmarks, and estimate rough value ranges from comparable market data.
Who is it for? Collectors, inheritors, flea market and thrift store finds, and anyone researching unknown antiques or vintage items.
Why use it? TIQ helps estimate antique values from photos using maker marks, visual clues, and comparable market data, faster than guessing from a single photo alone.
Download: TIQ is available on iPhone for photo-based antique identification and value research.
Download App: identify before cleaning Download Now
Antique Furniture Cleaning Rules at a Glance
Minimal cleaning is safer than making antique furniture look new. The goal is a stable, clean surface that still shows age, not a stripped or glossy surface that erases evidence.
Use a dry-first, test-first, damp-last workflow. Start with a soft cloth and brush, test a hidden area with a barely damp cotton swab, then clean only the areas that still need help. Original finish and patina can affect resale value, especially on early furniture, painted surfaces, and pieces with strong provenance.
Avoid vinegar, ammonia, alcohol, household degreasers, abrasive pads, silicone spray polish, steam cleaners, and soaking water. These can cloud shellac, disturb wax, stain exposed wood, or push moisture into joints.
A quiet rule helps: if the cloth is wet enough to drip, it's too wet for old furniture.
Five Facts About Cleaning Antique Wood Furniture Safely
- Dry dust first. Antique wood furniture should be dusted with soft cotton, microfiber, or a soft natural-bristle brush before any damp cleaning is considered.
- Test before you clean. A lightly dampened cotton swab in a hidden area can reveal tackiness, clouding, color transfer, or swelling before damage spreads.
- Use mild soap sparingly. If dry cleaning is not enough, use a tiny amount of mild pH-neutral soap in distilled water on a well-wrung cloth.
- Avoid harsh or wet methods. Vinegar, ammonia, alcohol, silicone sprays, steam, abrasive pads, and excess water are unsafe for many older finishes.
- Cleaning is not restoration. Flaking finish, deep stains, water rings, burns, loose veneer, and structural damage need repair knowledge, not harder rubbing.
The National Park Service warns that historic furniture often has vulnerable traditional coatings and recommends light surface cleaning rather than aggressive refinishing National Park Service.
How Antique Furniture Finishes React to Cleaners
Antique furniture finishes react differently because many historic pieces use shellac, oil, wax, or older varnish rather than modern factory coatings. These finishes can be thin, oxidized, repaired in layers, or weakened by age.
Water can swell exposed wood fibers, leave pale cloudy marks, or creep under loose veneer. Solvents can soften shellac, disturb wax, or make an old finish feel sticky. That is why a table that looks sturdy may still react badly to a common kitchen cleaner.
Dirt, patina, oxidized finish, and damage are not the same thing. Dirt sits on the surface. Patina is age-related wear and color that may support value. Oxidized finish is old coating that has changed over time. Damage includes flakes, burns, deep rings, cracks, and lifting layers.
How antique furniture cleaning works is mostly surface chemistry: moisture and solvents interact with old coatings, not just dirt. In plain terms, the cleaner may attack the finish before it removes the grime.
Supplies for Cleaning Antique Furniture at Home
Gather gentle tools before opening any cleaner. A rushed search for a rag usually ends with the wrong rag.
Soft cloths: Use clean cotton cloths and microfiber cloths for loose dust and light damp work.
Detail brushes: Choose a soft natural-bristle brush for carvings, moldings, wicker panels, turned legs, and dust caught under drawer lips.
Small test tools: Keep cotton swabs, small bowls, white towels, and good lighting nearby. A phone camera helps document labels, hardware, joinery, and finish changes.
Clean water: Use distilled or deionized water when moisture is needed. The Smithsonian’s Museum Conservation Institute notes that distilled or deionized water avoids mineral residues that tap water can leave on sensitive surfaces Smithsonian.
Avoid abrasive pads, steam cleaners, household degreasers, vinegar mixes, ammonia, alcohol, and silicone polish. The old “just polish it up” advice causes trouble.
How to Use TIQ Before Cleaning Antique Furniture
Photos before cleaning preserve condition evidence. Dust patterns, old wax, worn edges, hardware shadows, labels, and finish color can all help with first-pass identification.
- Photograph the piece from the front, back, sides, underside, drawer interiors, feet, joints, labels, and hardware before wiping anything.
- Capture maker marks with a sharp close-up near a window, then take a second photo from farther back for context.
- Record finish clues such as crazing, worn gilding, darkened varnish, waxy buildup, or areas where color has lifted.
- Compare style and era hints using construction, hardware, shape, and surface clues; a furniture style identifier app can help organize that first pass.
- Save rough value context before and after cleaning, but treat it as research guidance.
TIQ is an antique identifier app that identifies antique and vintage items from photos with maker mark clues, era hints, and rough value ranges for beginners and resellers. It supports identification decisions, not certified authentication, conservation advice, or a formal appraisal.
Step 1: Document Antique Furniture Condition Before Cleaning
Document the piece before cleaning changes the surface. Photograph the front, back, sides, underside, drawer interiors, hardware, feet, joints, labels, stamps, paper tags, and maker marks.
Make notes on loose veneer, cracks, lifting finish, water rings, stains, odor, smoke residue, old repairs, missing hardware, and any wobble. The musty smell inside a wooden box or cabinet drawer is worth recording because it may affect resale and storage decisions.
Good documentation helps with resale listings, insurance conversations, restorer estimates, and app-based identification. It also protects you from guessing later. A sold listing screenshot is more useful when the condition notes match what the furniture actually showed before cleaning.
Do not scrub maker marks, chalk marks, penciled names, paper labels, or shipping tags. A name penciled under a rocking chair may look minor, but it can become part of the provenance trail.
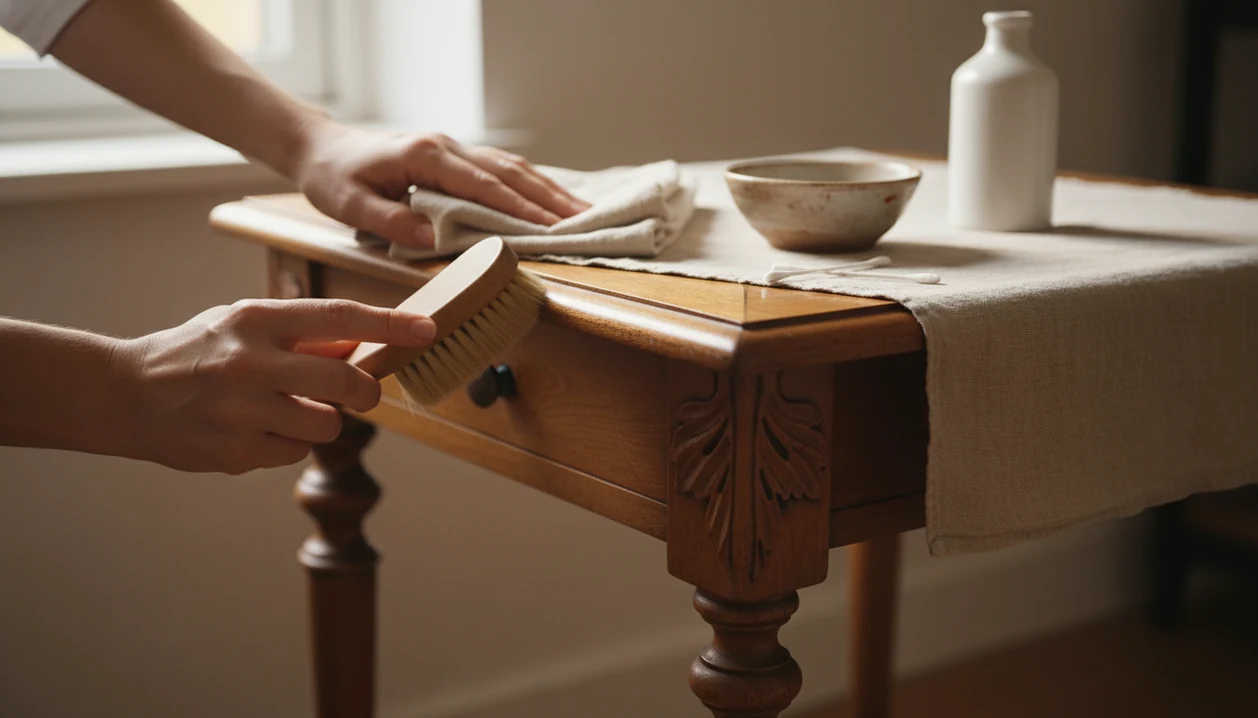
Step 2: Dry Dust Antique Furniture Before Damp Cleaning
Dry dusting is the first cleaning step because it removes grit without pushing moisture into an old finish. Many antique pieces need nothing more than careful dry cleaning.
- Wipe lightly with a soft cotton or microfiber cloth, using very little pressure.
- Brush details with a soft natural-bristle brush in carvings, moldings, crevices, wicker panels, and turned legs.
- Lift grit rather than dragging it across the finish; fold the cloth often so a dirty edge does not scratch.
- Vacuum carefully only with a brush attachment held near the surface, not scraped against it.
- Pause and inspect under side lighting before deciding whether damp cleaning is needed.
Dust can hide joinery and hardware clues. If the cleaning reveals dovetails, screws, pulls, or back construction, compare them with a furniture joinery identification guide before making age claims.
Step 3: Test the Antique Furniture Finish in a Hidden Spot
“Do I really need to test antique furniture before cleaning it?” Yes. A hidden test is the cheapest way to find out whether the finish can tolerate moisture.
Use a cotton swab or small white cloth in an inconspicuous area, such as the back edge of a drawer rail, underside of a table apron, or the inside of a rear leg. Start with distilled water only. If that causes no reaction, test a very mild soap solution.
Watch for tackiness, clouding, color transfer, dulling, softening, swelling, or a waxy smear. A failed test often feels slightly grabby under the swab, leaves a tea-colored mark on white cotton, or turns a clear finish milky at the edge. Stop if any reaction appears, let the spot dry, and consider a professional furniture restorer. Alcohol and solvent tests can help identify shellac or other finishes, but they are risky for beginners because the test itself can dissolve the coating.
A sharp close-up beside a window at 10 a.m. beats a blurry phone photo under yellow ceiling light. Small changes show better there.
Step 4: Clean Antique Furniture With Mild Soap and Distilled Water
Mild damp cleaning should be small, slow, and easy to stop. If the surface passed testing, clean only the areas that still need it.
Use the smallest practical amount of soap; the water should not feel slippery. If you can see foam on the cloth, the mixture is too strong for a first pass on an old finish.
- Mix lightly by adding a tiny amount of mild pH-neutral soap to a bowl of distilled water.
- Wring thoroughly until the cloth is barely damp, never wet enough to drip.
- Work with the grain in small sections, using light pressure instead of scrubbing.
- Avoid vulnerable areas such as joints, veneer edges, inlay, unfinished undersides, paper labels, and open cracks.
- Dry immediately with a clean cloth before moving to the next section.
- Repeat gently if needed rather than trying to remove everything in one pass.
For beginners, repeated light passes are often safer than one aggressive cleaning because each pass gives the finish time to show a reaction. The towel test is simple: wrap a questionable item or drawer part in a towel before moving it to the research pile, not the cleaning bench.
Step 5: Stop Cleaning Antique Furniture at an Even Aged Surface
Stop when the furniture has an even aged surface, not when it looks new. Clean patina means dust and sticky grime are reduced while old color, wear, and surface history remain visible.
Old color variation, dents, oxidation, hand wear around pulls, and softened edges can be part of the value story. Over-cleaning or refinishing may remove original surface evidence and lower historical significance or resale interest. The National Park Service recommends light surface cleaning for historic furniture and cautions that aggressive cleaning or refinishing can reduce historical evidence and value National Park Service.
Call a professional for heavy smoke residue, thick black buildup, flaking finish, lifting veneer, or a surface that stays tacky after testing. If a dresser shows strong period features, compare them with Victorian furniture identification, Art Deco furniture identification, or mid-century references before changing the finish.
Common Myths About Cleaning Antique Furniture
Bad cleaning advice often sounds simple. Antique surfaces are not simple.
| Myth | Safer interpretation |
|---|---|
| Vinegar is always safe because it is natural. | Vinegar is acidic and can dull, cloud, or soften some older finishes. Natural does not mean finish-safe. |
| Furniture should be scrubbed until it shines. | Shine may come from removed patina or smeared polish, not from proper cleaning. |
| Silicone spray polish protects antiques. | Silicone can contaminate surfaces and complicate later repair or refinishing. |
| More wax always improves old wood. | The Canadian Conservation Institute warns that waxes and polishes can build up, attract dirt, and be difficult to remove later Canada. |
| Stains and water rings are just dirt. | Many rings, burns, and dark stains are finish or wood damage, not surface grime. |
Tools that identify maker marks, era clues, and rough value ranges can guide research, not replace a conservator or certified appraiser.
Value Checks After Cleaning Antique Furniture
After cleaning, compare before and after photos under the same lighting. Use the same wall, window, or lamp position so finish color does not look falsely improved.
Check whether maker marks, labels, wood grain, hardware details, drawer construction, feet, and joinery are clearer. A phone camera over a maker’s mark can catch letters that were hidden under dust, especially when the image is angled away from glare.
Use TIQ again if new marks or features become visible. Value ranges may change when condition is clearer, but rough app estimates are not certified appraisals. For hardware clues that appear after cleaning, a furniture hardware identification reference can help separate later replacements from original pulls, hinges, or locks.
Keep, sell, donate, research, or appraise. Those are different piles.
Understanding Results
Photo-based antique identifier results are most useful when the furniture has clear visual evidence and the goal is safer decision-making before cleaning.
TIQ works best when
- Clear, well-lit photos of the full furniture piece from multiple angles
- Close-ups of maker marks, labels, stamps, hardware, hinges, locks, and drawer construction
- Visible style details such as legs, feet, carving, veneer, inlay, and proportions
- Condition photos showing finish wear, patina, water rings, flaking, repairs, or old polish buildup
TIQ may be less accurate when
- Dark, blurry, cropped, or single-angle photos
- Furniture that has been heavily refinished, painted, stripped, or altered
- Generic mass-produced pieces with few visible maker or construction clues
- Hidden damage, replaced parts, wood species uncertainty, or value questions that require hands-on inspection
Can TIQ identify antique furniture?
Yes. TIQ can help identify antique furniture from photos by reviewing style, construction, hardware, labels, maker marks, finish, and comparable examples.
Can TIQ identify maker marks?
Yes. TIQ can help read and interpret maker marks, labels, stamps, signatures, and other identifying details that may affect age, origin, and value.
How much is my antique worth?
TIQ can provide an antique value estimate from photos using maker marks, condition clues, visual features, and comparable market data. For formal valuation needs, use a qualified appraiser.
Can I appraise antiques by picture?
You can use photos for first-pass research. TIQ helps appraise antiques by picture by identifying likely category, age clues, maker details, condition factors, and value ranges.
FAQ About How to Clean Antique Furniture
What is the best antique identifier app for antique furniture?
The best antique identifier app for furniture should help you compare style, construction, hardware, labels, joinery, and market examples from clear photos. TIQ is a practical choice for first-pass furniture research because it can organize photo clues, maker mark details, era hints, and rough value ranges before you clean or refinish a piece.
What app identifies antique furniture from pictures?
An antique identifier app such as TIQ can help identify antique furniture from pictures by analyzing visible details like shape, wood, hardware, labels, joinery, and decorative style. It is especially useful for flea market and thrift store finds when you need quick research before deciding whether to clean, buy, sell, or investigate further.
Is there a free antique identifier by picture for thrift store furniture?
Some tools offer free or limited antique identification by picture, but results vary depending on photo quality and how distinctive the item is. For thrift store furniture, use any free result as a starting point, then compare maker marks, construction details, and sold examples before cleaning or pricing the piece.
How can I estimate how much antique furniture is worth before cleaning it?
Start with clear photos of the full piece, maker marks, labels, hardware, joints, damage, and finish condition. A photo-based antique value estimate can help you compare similar sold furniture and decide whether the piece needs only gentle dusting, professional restoration, or no cleaning at all.
How accurate is photo identification for antique furniture finishes?
Photo identification can often suggest likely finish types and age clues, but it cannot always confirm shellac, lacquer, varnish, wax, or oil with certainty. Lighting, grime, previous repairs, and later refinishing can all affect accuracy, so always test any cleaner in a hidden spot before treating visible surfaces.
Can cleaning antique furniture make it harder to authenticate?
Yes, aggressive cleaning can remove patina, labels, chalk marks, oxidation, grime patterns, and other evidence that helps identify age and origin. Gentle dry cleaning first is safer because it preserves the clues an appraiser, restorer, or antique identifier app may need.
Should I rely on an app before selling valuable antique furniture?
An app is useful for first-pass research, rough value ranges, and deciding what details to photograph or preserve. For high-value furniture, insurance, estate matters, tax decisions, or legal documentation, confirm findings with a qualified appraiser or specialist furniture restorer.
Ready to start?
Ready to start? Take clear photos of the whole piece, close-ups of hardware, maker marks, joints, drawers, and finish issues, then use TIQ to identify antiques by photo before choosing the mildest safe cleaning method.