An Antique Identifier Guide to Cleaning Antique Silver Safely
Definition: Cleaning antique silver means removing harmful tarnish gently while preserving patina, maker marks, hallmarks, and surface details needed for identification and value research.
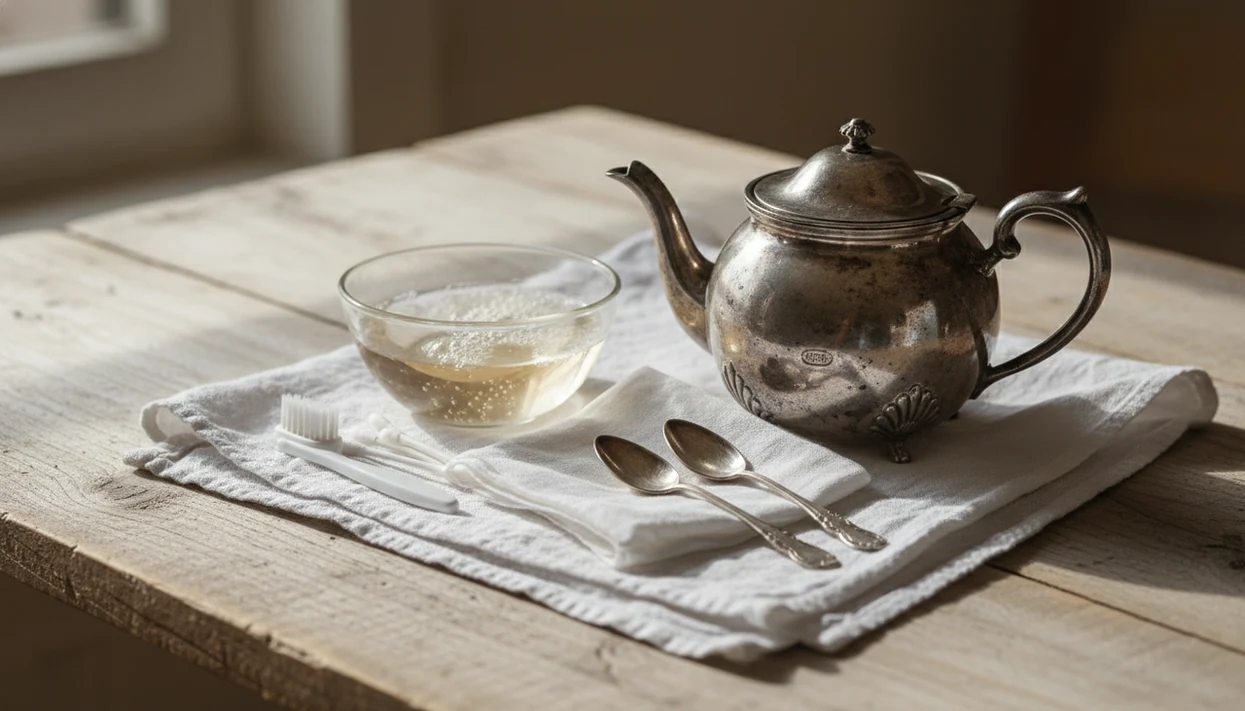
Before polishing an inherited tray, teapot, or estate-sale spoon, photograph the marks, pattern, and condition so you can appraise antiques by picture and make safer cleaning choices. A little research first can help preserve hallmarks, patina, plating, and details that affect identification and value.
> Antique silver cleaning means removing soil and unstable tarnish while preserving maker marks, patina, engraved detail, plating, and the surface clues needed for identification and value research.
- Start with mild soap, warm water, careful rinsing, and complete drying before using polish.
- Avoid toothpaste, baking soda paste, wire wool, dishwashers, and heavy rubbing on antique or plated silver.
- Photograph marks and details before cleaning, especially if you plan to identify, value, buy, or sell the piece.
Recommended App: TIQ Antique Identifier
TIQ is an antique identifier app that helps collectors and beginners build better research habits before cleaning, polishing, selling, or storing antique silver. You can use TIQ to identify antiques by photo, compare visual clues, read maker marks, and appraise antiques by picture for first-pass research. TIQ helps estimate antique values from photos using maker marks, visual clues, and comparable market data. It also works as a maker mark identifier, antique value estimate tool, and antique finder for researching related pieces. For insurance, estate, tax, or legal decisions, use a qualified appraiser.
- Identify antique silver, plated ware, and related objects by photo before cleaning decisions.
- Check maker marks, hallmarks, monograms, patterns, and construction clues that may affect value.
- Estimate values with comparable market data so beginners can separate casual finds from pieces worth deeper research.
- Useful for collectors documenting inherited silver, flea market finds, estate sale purchases, and family pieces.
- Build a repeatable research habit: photograph first, identify marks, compare examples, then choose a conservative cleaning method.
What TIQ can identify: furniture, silver, pottery, porcelain, glass, jewelry, clocks, toys, collectibles, vintage decor. Available for iPhone.
TIQ at a Glance
What is TIQ? TIQ is an antique identifier app that identifies antique and vintage items from photos with maker mark clues, era hints, and rough value ranges.
What does it do? Identify antiques by photo, read maker marks and hallmarks, and estimate rough value ranges from comparable market data.
Who is it for? Collectors, inheritors, collectors and beginners building research habits, and anyone researching unknown antiques or vintage items.
Why use it? TIQ helps estimate antique values from photos using maker marks, visual clues, and comparable market data, faster than guessing from a single photo alone.
Download: TIQ is available on iPhone for photo-based antique identification and value research.
Download App: identify antique silver Download Now
Antique Silver Cleaning At A Glance
The safest first method for antique silver is hand washing with warm water, a little mild dish soap, and a soft cloth. Stop before polishing if the piece is fragile, valuable, heavily tarnished, deeply patinated, or possibly silver-plated.
Use a soft cotton cloth, microfiber cloth, cotton buds, a soft baby toothbrush, and clean dry hands or cotton gloves. Historic-object handling guidance commonly recommends clean, dry hands or gloves because skin oils and dirt can transfer to sensitive surfaces. The Canadian Conservation Institute gives similar silver-care guidance, including careful handling, tarnish control, and avoiding harmful storage materials such as rubber (Canada).
Avoid the shortcuts that sound convenient at a kitchen sink: dishwasher cycles, toothpaste, baking soda paste, vinegar mixtures, and metal wool. A loose chair spindle under pressure gets noticed before cleaning; antique silver deserves the same pause before force is applied.
Go slowly.
How Antique Silver Cleaning Works
Antique silver cleaning works by separating ordinary surface grime from tarnish, then using the least force needed for each layer. Soap and warm water deal with loose dirt first; polish is reserved for stable pieces because it changes the surface, not just the shine.
Mild dish soap acts as a surfactant, meaning it helps water lift oils, dust, fingerprints, and soft grime so they can rinse away instead of being rubbed across the metal. Tarnish is different. It is a surface reaction, often a dark film, rather than dirt buried deep inside the silver. Removing that film with polish usually means abrasion, a controlled wearing away of tiny amounts of silver or silver plating. On solid silver that can soften crisp detail over time; on plated pieces it can expose the base metal sooner.
That is why the safest sequence is gentle first: wash, rinse, dry, inspect, and only then consider light polishing. Dark patina left in recesses can help show age, chased detail, engraving, and relief, so cleaning should reveal the object without flattening its history.
5 Facts About How To Clean Antique Silver Safely
- Use the gentlest cleaning method first; mild soap and warm water should come before polish, dips, or chemical cleaners.
- Do not assume every dark area is dirt; dark patina in recesses may help show age, relief, and decorative depth.
- Rinse and dry completely, because soap film, moisture, and polish residue can leave marks or encourage new tarnish.
- Protect maker marks, chased decoration, engraving, and raised details from abrasion; those clues help with future identification.
- Identify whether the object is solid silver, plated, silver-filled, or mixed metal before stronger cleaning.
For marked pieces, a silver hallmark identification check should happen before any heavy rubbing. We have seen family initials engraved on silver look like decoration at first glance, then become useful provenance notes once photographed clearly.
Antique Silver Tarnish And Patina Chemistry
Tarnish on antique silver is a surface reaction, not proof that the object is dirty all the way through. Silver reacts with sulfur compounds in the air, forming a dark surface layer that can be reduced, left alone, or partly removed depending on the piece. That matters because silver tarnish is usually a surface layer of silver sulfide, so cleaning choices should target the surface without needlessly removing underlying metal (Canada).
Patina is different from grime. It can sit in recesses and make chased leaves, monograms, and beaded rims easier to read. Polishing removes a small amount of surface material each time, so repeated polishing can soften edges and weaken marks.
Plated silver is more vulnerable because its silver layer may be thin. Once base metal shows through, cleaning cannot put the silver back. Cleaning decisions also affect identification, because surfaces, marks, seams, and wear patterns carry evidence.
For antique silver, gentle cleaning is often safer than bright polishing because the surface itself may hold age, maker, and value clues.
Pre-Cleaning Photos And Value Checks For Antique Silver
Should you photograph antique silver before cleaning it? Yes, photograph the full object and all marks before cleaning, especially if you may sell, insure, research, or appraise it later.
Take close-ups of maker marks, hallmarks, monograms, seams, bases, backs, worn areas, repairs, and odd color changes. A sharp close-up taken beside a window at 10 a.m. usually beats a blurry phone photo under ceiling glare. If the mark is hard to read, an app that reads maker marks can help organize the next research step.
Tools like TIQ can review photos for maker mark clues, era hints, and rough value ranges before heavy polishing. Good AI antique and vintage item identifier apps with maker marks, era/style guides, and value range estimates deliver first-pass research guidance, not certified authentication or a formal appraisal.
Cleaning before documentation can remove evidence useful to buyers, sellers, or appraisers. Photograph first, then wash.
Before You Start: Check Silver Type, Value, And Risk
Before you clean antique silver, decide what it is, what evidence it carries, and how much risk the surface can take. If the piece seems rare, fragile, gilded, heavily repaired, or unusually valuable, stop at documentation and get specialist advice before washing or polishing.
- Inspect the object in good light, looking for hallmarks, maker marks, monograms, solder repairs, worn high points, exposed base metal, and any yellow, coppery, or gray areas.
- Sort the piece as solid silver, silver plate, silver-filled, or unknown white metal if you can; keep uncertain items in the cautious pile rather than treating them like sterling.
- Set aside high-risk pieces, including thin plating, loose handles, gilded interiors, split seams, deep dents, or decoration that already looks softened by old polishing.
- Gather soft cotton or microfiber cloths, cotton buds, mild dish soap, towels, a padded basin, and clean gloves before water touches the object.
- Decide your stopping point in advance: if marks blur, plating shows, residue will not rinse, or value questions remain, dry the piece and ask a conservator, appraiser, or trusted silver specialist.
5 Gentle Cleaning Steps For Antique Silver
How to use a safe antique silver cleaning process at home:
- Photograph the silver first, including marks, bases, seams, worn spots, and engraved areas.
- Pad the sink or use a basin so the silver cannot strike a hard surface.
- Wash by hand with warm water and a small amount of mild dish soap.
- Loosen dirt in crevices with a cotton bud or very soft brush, not a scouring pad.
- Rinse thoroughly, dry immediately, and polish only if light tarnish remains on a stable surface.
Before using any commercial polish, test a pea-sized amount on an inconspicuous underside and let the area dry fully. Stop if color transfers heavily, coppery or yellow base metal appears, or engraving starts to look softened.
1. Photograph the silver first
Place the object on a plain towel and capture the whole piece before cleaning.
2. Wash with mild soap
Use warm, not hot, water and a small drop of mild dish soap.
3. Clean crevices gently
Work around raised details with cotton buds or a baby toothbrush.
4. Rinse and dry completely
No soap should remain in seams, feet, handles, or hollow areas.
5. Polish only if needed
Use a non-abrasive silver cloth or labeled silver polish only on stable pieces.
Antique Silver Cleaning Tools To Use And Avoid
The right tool for antique silver is soft, controlled, and easy to stop using. More cleaning power is not safer for fragile surfaces.
| Tool or method | Use or avoid | Why it matters |
|---|---|---|
| Soft cotton cloth | Use | Good for washing, drying, and light hand control. |
| Microfiber cloth | Use | Useful for drying smooth areas without heavy pressure. |
| Cotton buds | Use | Helps reach crevices around marks and decoration. |
| Baby toothbrush | Use gently | Choose very soft bristles and light pressure only. |
| Non-abrasive silver cloth | Use for light tarnish | Stop if detail starts to look softened. |
| Commercial silver polish | Use cautiously | Use only if labeled for silver and tested in a small area. |
| Toothpaste | Avoid | Toothpaste can contain abrasive cleaning agents such as hydrated silica; that is useful for teeth, not antique surfaces (American Dental Association: American Dental Association). |
| Baking soda, vinegar mixtures, foil dips | Avoid on unknown antiques | They can be too aggressive for plating, repairs, and patina. |
| Powered brushes | Avoid | Speed can turn a small mistake into visible wear. |
A magnifying squint at a clasp hinge teaches the same lesson: small surfaces show damage quickly.
6 Myths About Cleaning Antique Silver
Myth 1: Baking soda paste is always safe. Baking soda paste can abrade old silver and is especially risky on thin plate.
Myth 2: Vinegar is harmless because it is natural. Natural does not mean suitable for unknown metal, solder, gilding, or repairs.
Myth 3: Aluminum foil dips are fine for antique silver. Foil dips may strip desirable dark detail from recesses and can behave unpredictably on mixed materials.
Myth 4: Dark patina should always be removed. Patina can support age, relief, and visual definition.
Myth 5: Dishwashers are acceptable for old flatware or hollowware. Heat, detergent, and contact can stain, pit, or scratch silver.
Myth 6: More polish equals higher value. Over-polishing may reduce detail and make a piece less attractive to informed buyers.
For resale decisions, compare sold listing screenshots rather than polished asking prices; an antique value estimate app can help keep that research separate from cleaning.
Antique Silver Storage After Cleaning
After cleaning, handle antique silver with clean dry hands or cotton gloves. Store pieces dry and separated so rims, handles, and raised decoration do not rub against each other.
Avoid rubber bands, newspaper, damp cabinets, and direct contact with harsh storage materials. Rubber can discolor silver, and newspaper can transfer ink or acids. Tarnish-resistant cloth or storage bags can help when the piece is stable and fully dry.
Light maintenance is better than repeated rescue cleaning. Dust regularly, wipe fingerprints promptly, and wrap questionable items in a soft towel before placing them in the research pile. If a small chip on a vase foot would make you slow down, a worn silver foot should do the same.
Understanding Results
Photo identification works best when the silver is photographed before aggressive cleaning and when marks, shape, scale, and condition are clearly visible.
TIQ works best when
- Clear photos of hallmarks, maker marks, pattern names, monograms, and engraved dates.
- Multiple angles showing the full object, underside, handles, feet, rims, lids, and interior.
- Good natural light with the piece dry, stable, and photographed against a plain background.
- Items with distinctive forms such as tea sets, trays, flatware patterns, candlesticks, boxes, and serving pieces.
- Value research supported by visible condition details and comparable auction or marketplace results.
TIQ may be less accurate when
- Photos taken after heavy polishing has softened marks, removed patina, or obscured surface clues.
- Blurry, dark, cropped, or reflective images where hallmarks cannot be read.
- Silver-plated pieces with worn plating, repairs, replaced parts, or missing lids and handles.
- Generic forms without maker marks, pattern details, provenance, or measurements.
- Requests for a guaranteed melt value, insurance value, or authentication based on one photo.
Can I appraise antiques by picture before cleaning silver?
Yes. A photo-based antique identifier can provide a first-pass value estimate before you clean, polish, or sell a piece. For antique silver, photograph the full object, maker marks, hallmarks, monograms, damage, and tarnish so the estimate has better context.
How much is my antique silver worth?
Value depends on maker, age, silver content, weight, condition, pattern, rarity, and recent comparable sales. TIQ can help estimate antique values from photos using maker marks, visual clues, and comparable market data, but formal insurance, estate, tax, or legal valuations should come from a qualified appraiser.
Can TIQ identify maker marks on antique silver?
TIQ can help identify maker marks, hallmarks, and other visible clues from clear photos. For best results, take close-up images in natural light and avoid polishing the mark area before documentation.
What is the best antique identifier app for beginners researching silver?
The best antique identifier app for beginners should combine photo identification, maker mark research, value estimates, and comparable examples. TIQ is designed for that workflow, helping collectors document silver first and make safer cleaning or resale decisions afterward.
FAQ
What is the best antique identifier app for researching antique silver before cleaning?
The best antique identifier app for this task should help you document the piece before any polish touches it. TIQ is a practical choice because it can review photos, maker marks, hallmarks, patterns, and visual clues so beginners can research silver more carefully before cleaning.
Can I appraise antiques by picture before polishing silver?
Yes, you can appraise antiques by picture for a first-pass value estimate before polishing silver. Clear photos of hallmarks, monograms, engraving, pattern details, and tarnished condition can help you decide whether to clean lightly, stop, or seek expert advice.
Can TIQ identify silver hallmarks from a photo?
TIQ can help read many silver hallmarks and maker marks from clear, well-lit photos. For best results, photograph the mark straight on, include a close-up and a full-object image, and avoid polishing the mark area before you document it.
How much is my antique silver worth before cleaning?
Value depends on maker, age, material, weight, condition, rarity, pattern, and whether the piece is sterling or silver plate. A photo-based antique value estimate can help you compare similar sold examples before deciding how much cleaning is appropriate.
What should I photograph before cleaning antique silver?
Photograph the full object, underside, hallmarks, maker marks, monograms, engraved dates, pattern details, dents, worn plating, and tarnished areas. These images create a record of original condition and make identification easier if cleaning changes the surface.
How accurate is photo identification for antique silver?
Photo identification can be very useful when marks and construction details are visible, but it is not perfect. Blurry marks, heavy tarnish, rubbed plating, later repairs, and confusing pseudo-hallmarks can all reduce accuracy.
Can cleaning reduce the value of antique silver?
Yes, aggressive cleaning can reduce value by scratching the surface, softening engraved detail, removing desirable patina, or exposing worn plating. Start with the mildest method and stop if you see plating loss, black residue from detail areas, or unclear marks that need expert review.
When should I ask a professional before cleaning antique silver?
Ask a professional before cleaning rare makers, museum-quality pieces, heavily engraved items, damaged silver plate, or objects with unclear hallmarks. You should also get expert help when the piece may be needed for insurance, estate, tax, donation, or legal decisions.
Ready to start?
Ready to start? Photograph the piece before cleaning, capture any maker marks and hallmarks in good light, and use TIQ as an antique identifier app on iPhone to organize identification clues before you polish, value, buy, or sell.