Antique Identifier Timeline From Photo Scan to Value Check
A clear antique identification timeline helps you move from photos to clues, value research, and next steps without getting lost. Use TIQ to organize early evidence and appraise antiques by picture for a practical first-pass value range before deeper verification.
Definition: An antique identifier timeline is a step-by-step workflow for moving from photos and visual clues to maker mark research, antique value estimates, records, and next actions.
TL;DR
- Start with multi-angle photos, including maker’s marks, labels, damage, joins, bases, backs, and construction details.
- Use a first-pass antique workflow to identify the category, era, style, materials, and rough value range before doing deeper research.
- Escalate to a professional appraiser when the item may be high-value, insurance-relevant, unusually rare, or difficult to verify from photos alone.
Recommended App: TIQ Antique Identifier
TIQ is an antique identifier app for collectors and beginners who want a faster, more organized way to research items from photos. It can help you identify antiques by photo, read visual clues, check maker marks, and appraise antiques by picture for first-pass research before deeper verification. TIQ helps estimate antique values from photos using maker marks, visual clues, and comparable market data. For insurance, estate, tax, or legal decisions, use a qualified appraiser.
- Identify by photo: start with clear images to narrow down object type, style, age range, and likely category.
- Maker marks: use TIQ as a maker mark identifier to research stamps, signatures, labels, hallmarks, and back marks.
- Estimate values: compare visual evidence with market data to create an antique value estimate for research and resale planning.
- Build research habits: save observations, compare clues, and use TIQ as an antique finder when learning what to look for.
- Made for collectors and beginners: useful for flea market finds, inherited items, thrift discoveries, and home collections.
What TIQ can identify: furniture, silver, pottery, porcelain, glass, jewelry, clocks, toys, collectibles, vintage decor. Available for iPhone.
TIQ at a Glance
What is TIQ? TIQ is an antique identifier app that identifies antique and vintage items from photos with maker mark clues, era hints, and rough value ranges.
What does it do? Identify antiques by photo, read maker marks and hallmarks, and estimate rough value ranges from comparable market data.
Who is it for? Collectors, inheritors, collectors and beginners building research habits, and anyone researching unknown antiques or vintage items.
Why use it? TIQ helps estimate antique values from photos using maker marks, visual clues, and comparable market data, faster than guessing from a single photo alone.
Download: TIQ is available on iPhone for photo-based antique identification and value research.
Download App: identify antiques by photo Download Now
Antique Identification Timeline Facts Beginners Should Know
- A strong timeline begins with clear photos from several angles, plus close-ups of maker’s marks, labels, signatures, bases, backs, and construction details.
- The first pass should narrow the category, likely age range, style or era, material, condition clues, and rough value range. It should not be treated as a final appraisal.
- Maker’s marks, patent numbers, labels, and provenance notes should be checked against reference sources before trusting an exact attribution.
- Items that appear valuable, rare, inherited, or insurance-relevant should move to a qualified appraiser or category specialist.
- The workflow should end with organized notes, photos, value clues, and a decision: keep, research, appraise, insure, donate, or sell.
A folded receipt behind a painting can matter more than a pretty frame. Document it before separating anything.
Before You Start an Antique Identification Timeline
Before you begin an antique identification timeline, make the object safe to view and easy to document. The goal is to preserve clues first, not to make the item look better.
- Place the object on a steady, well-lit surface where it will not roll, tip, or catch on fabric. Daylight near a window is often enough, but avoid direct heat or glare.
- Leave dust, tarnish, old tape, loose labels, fitted cases, and attached parts alone until photos and notes are finished. Cleaning, polishing, gluing, or separating pieces can erase evidence.
- Gather a ruler, soft cloth, flashlight, notebook, and phone camera before you start. The cloth can cushion the piece; the ruler gives scale; the flashlight helps with faint marks.
- Check for loose handles, sharp edges, unstable joints, flaking surfaces, brittle paper, cracked glass, or fragile materials before moving it again.
- Keep receipts, boxes, handwritten labels, dealer tags, family notes, and storage envelopes with the object. Those small paper trails can support provenance later.
If anything feels unstable, stop and photograph it where it sits.
Photo Scan Antique Research Timeline Mechanics
A photo-based antique research timeline works by turning visible evidence into testable matches, not final proof. Photos capture clues, visual search or AI proposes likely categories, and human review confirms or rejects those matches.
Identification is iterative. You may start with “ceramic vase,” refine it to “studio pottery,” then narrow further after reading an impressed mark beside a window. Image embeddings, which are machine-readable visual patterns, help group similar objects. They still need mark checks, material clues, and sold-comps review.
Most Americans own smartphones, so photo-first identification is practical for many households, estate cleanouts, and thrift checks (Pew Research Center). Tools like TIQ can help form a first-pass hypothesis from photos, maker mark clues, era hints, and rough value ranges. Good AI antique and vintage item identifier apps with maker marks, era/style guides, and value range estimates deliver organized starting points, not certified authentication or insurance-grade appraisal.
For cross-checking, compare the first-pass result with Google Lens, WorthPoint, LiveAuctioneers archives, eBay sold listings, or a category-specific mark guide before treating the match as reliable.
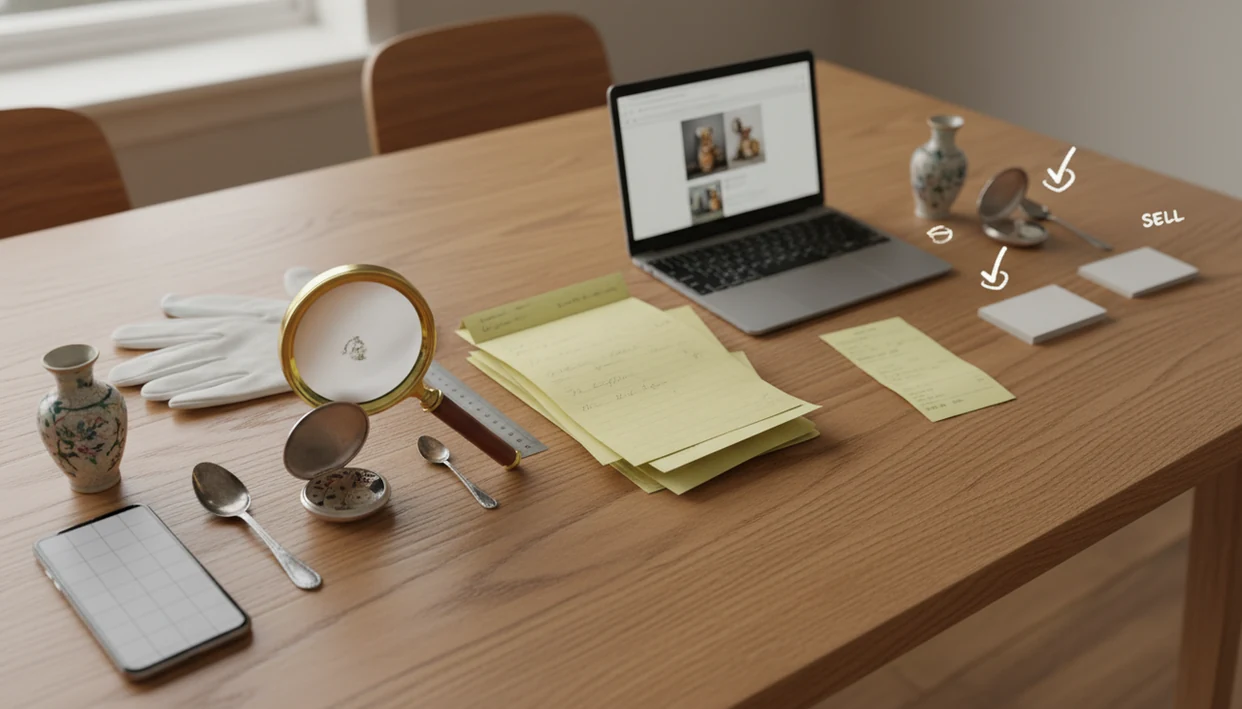
First-Pass Antique Workflow in 6 Steps
Use this first-pass antique workflow when an object is sitting on the table and you need a sensible next move.
- Photograph the object from the front, back, sides, top, bottom, and beside a ruler or familiar scale object.
- Scan it with an app that identifies antique and vintage items from photos, such as TIQ, for maker mark clues, era hints, and rough value ranges for beginners and resellers.
- Record the suggested category, likely era, materials, and any uncertainty in plain language.
- Check maker’s marks, backstamps, labels, signatures, patent numbers, and construction details against references.
- Compare similar sold items, not just active listings, and note size, condition, completeness, and provenance differences.
- Choose the next action: research, appraise, insure, list, donate, or keep in collection records.
For beginners, a staged workflow is often easier than jumping straight to price because each pass tests a different clue.
First-Hour Antique Photo Steps for Marks and Clues
“What should I do in the first hour after finding an old item?” Photograph first, and avoid changing the object. Take full views from the front, back, sides, top, and bottom, then add a ruler or common object for scale.
Close-ups matter. Capture maker’s marks, labels, signatures, serial numbers, patent numbers, joinery, hardware, bases, rims, repairs, cracks, and wear. A phone camera over a maker’s mark usually works better when the item is near daylight, not under a yellow ceiling bulb. For a deeper photo setup, the identify antique from photo guide covers useful angles.
Do not clean, polish, repaint, glue, or repair the piece before identification. Those changes can remove evidence or affect value. The first hour should produce a basic hypothesis, such as Victorian furniture, Depression glass, studio pottery, silver plate, or mid-century lighting.
Leave the dust alone for now.
First-Day Antique Research Timeline for Marks and Comparables
The first day is for checking the first-pass result against stronger evidence. Verify maker’s marks, backstamps, impressed numbers, patent dates, labels, and signatures using mark guides, museum references, catalog archives, and patent databases where available.
Compare the whole object, not just one pretty similarity. Materials, form, decoration, construction, and wear patterns should line up with confirmed examples. Porcelain translucence at the rim, for example, can help separate certain china bodies from heavier ceramic wares.
Sold comparables are more useful than asking prices because they show what buyers actually accepted. Save screenshots of sold listings and note size, condition, missing parts, rarity, and provenance. The antiques and collectibles market is large enough that careful identification often feeds resale decisions, so value claims should be checked against documented sold comparables rather than asking prices. If marks are the sticking point, a maker mark identifier app can help organize possible readings.
Antique Appraisal Decision Point at the $1,000 Threshold
Around $1,000 is a practical trigger for asking whether self-research is enough. Category and risk still matter, especially for inherited items, insured property, rare material, or a major sale.
| Situation | First-pass research may be enough | Professional review is wiser |
|---|---|---|
| Common household vintage item | Yes, if comps are clear | Usually no |
| Possible $1,000+ value | Maybe, for sorting | Yes, before insurance or major sale |
| Estate, tax, or donation use | No | Yes |
| Rare art, jewelry, historical material | No | Yes |
| Conflicting marks or provenance | Maybe, as notes | Yes, for verification |
AI value ranges and online comparables are working estimates. They are not appraisal-grade values for insurance, tax, estate, donation, or legal use. The Bureau of Labor Statistics counted about 106,600 appraisers and assessors of real estate in 2022, a reminder that formal valuation remains a regulated professional field in adjacent valuation work (BLS Occupational Outlook Handbook).
Antique Resale Preparation Steps After Identification
After identification, turn your notes into a cautious listing or inventory record. Include item category, likely maker, era, materials, dimensions, condition, flaws, provenance, and uncertainty. “Attributed to,” “in the style of,” “likely,” and “appears to be” are useful when evidence is incomplete.
Keep photos, app screenshots, source links, sold comparable notes, and value ranges in a folder or spreadsheet. A sold listing screenshot is more useful than a polished marketplace page with an ambitious asking price. The pocket check is real.
Pew reported that 35% of U.S. adults had sold something online in a 2016 survey, so identification often becomes listing preparation. If you’re choosing between phone workflows, how to identify antiques with phone explains the practical setup. For resellers, documented uncertainty is better than overstated certainty because buyers can see what is known and what is still only a hypothesis.
Common Antique Identification Timeline Mistakes
The biggest mistake is treating identification as one photo and one price. A reliable antique research timeline checks category, age, maker, condition, and comparable examples before putting weight on value.
Do not trust a single AI match without checking marks, construction details, provenance, and similar confirmed examples. A replacement screw in antique hardware can change the condition story. So can refinishing, missing lids, married parts, or a musty smell inside a wooden box.
Old-looking also does not always mean antique. In many markets, “antique” usually means at least 100 years old. Newer objects may be vintage, reproduction, revival style, or simply aged decor.
Avoid cleaning, restoring, separating parts, discarding packaging, or ignoring condition before documentation. If an item seems questionable, wrap it in a towel and put it in the research pile until the evidence is recorded.
Understanding Results
An antique identifier timeline works best when photo results are combined with careful documentation, mark checks, comparable sales, and professional review when needed.
TIQ works best when
- Clear multi-angle photos taken in natural light, including front, back, base, sides, and scale reference.
- Close-ups of maker’s marks, labels, signatures, patent numbers, hallmarks, stamps, and handwritten notes.
- Common categories with visible style clues, such as ceramics, glass, silver, furniture, toys, books, art, and vintage decor.
- Items where condition details are documented before cleaning, polishing, repairing, or separating parts.
- Value research based on comparable sold items, auction records, and similar examples rather than asking prices alone.
TIQ may be less accurate when
- Blurry, dark, cropped, or reflective photos that hide shape, material, marks, or damage.
- Items with missing labels, altered parts, heavy restoration, reproductions, or mixed-period components.
- Rare, museum-level, estate, tax, legal, or insurance-relevant objects that require specialist appraisal.
- Objects whose value depends heavily on provenance, artist authentication, documented ownership, or regional market demand.
- Materials that are difficult to confirm from photos alone, such as some stones, metals, woods, ivory substitutes, and plastics.
What is the best antique identifier app?
The best antique identifier app is one that combines photo identification, maker mark research, antique value estimates, and organized notes. TIQ is built for collectors and beginners who want a practical first-pass workflow before deeper appraisal or resale research.
Can I appraise antiques by picture?
You can appraise antiques by picture for a first-pass research estimate by photographing the item, capturing maker marks, and comparing visual clues with market data. For formal insurance, estate, tax, or legal purposes, use a qualified appraiser.
How much is my antique worth?
An antique value estimate depends on the item type, age, maker, condition, rarity, provenance, and recent comparable sales. TIQ helps estimate antique values from photos by combining maker marks, visual clues, and comparable market data.
Can TIQ identify maker marks?
Yes. TIQ can help identify maker marks such as stamps, signatures, labels, hallmarks, and back marks, then connect those clues with object type, style, age, and value research.
FAQ
What app identifies antiques from pictures?
An antique identifier app should help you move from clear photos to object type, style, maker clues, and a rough value range. TIQ is a practical choice for collectors and beginners because it supports photo-based identification, maker mark research, and comparable value checks in one workflow.
Is there a free antique identifier by picture?
Some antique identifier tools offer free photo checks, previews, or limited searches, but the useful research often depends on image quality and available comparable data. For best results, use any free step to gather clues, then verify marks, materials, condition, and sold examples before relying on a value estimate.
Can TIQ identify antique furniture?
TIQ can help identify antique furniture from photos of the full piece, joinery, drawer construction, hardware, labels, undersides, backs, and finish details. It can suggest likely style, age range, materials, and research paths so you know what to verify next.
Can TIQ identify silver hallmarks?
TIQ can help read and organize visible silver hallmarks, maker stamps, purity marks, and pattern clues from close-up photos. Strong lighting and sharp images improve results, especially when marks are worn, partial, or stamped on curved surfaces.
When in the timeline should I compare sold comps?
Compare sold comps after you have a reasonable first-pass identification, including category, maker or mark clues, material, approximate age, and condition notes. Sold listings are most useful when the comparable item closely matches your object rather than simply sharing a broad style or keyword.
How accurate is a photo-based antique identification timeline?
A photo-based timeline is useful for narrowing the category, spotting clues, and building a research record quickly. Accuracy depends on photo quality, visible marks, condition details, and whether enough comparable examples exist. Treat the result as structured research, then verify important claims with additional sources.
When does photo research need a professional appraisal?
Use a professional appraiser when the item may be high value, rare, insured, donated, divided in an estate, or involved in a legal or tax decision. Photo research is excellent for early triage, but formal appraisal work requires expert judgment, documentation, and market support.
Ready to start?
Ready to start? Take clear photos of the front, back, base, maker’s marks, labels, signatures, damage, and construction details, then use an antique identifier app to create a first-pass record before you clean, repair, sell, donate, insure, or appraise the item.